A removable paper sleeve gives a birthday present two reveals: first a hidden greeting, then the gift itself. You only need a strip of contrasting paper and a little room to write. Personalize the outside with a name and tuck the surprise message underneath.
This works especially well on a book, journal or shallow rectangular box. Start with a smoothly wrapped package, then choose two papers: one for the outside sleeve and another for the small greeting panel. The decoration stays on the wrapping, so the gift itself remains untouched.
Birthday Gift Wrapping Ideas That Start With the Person
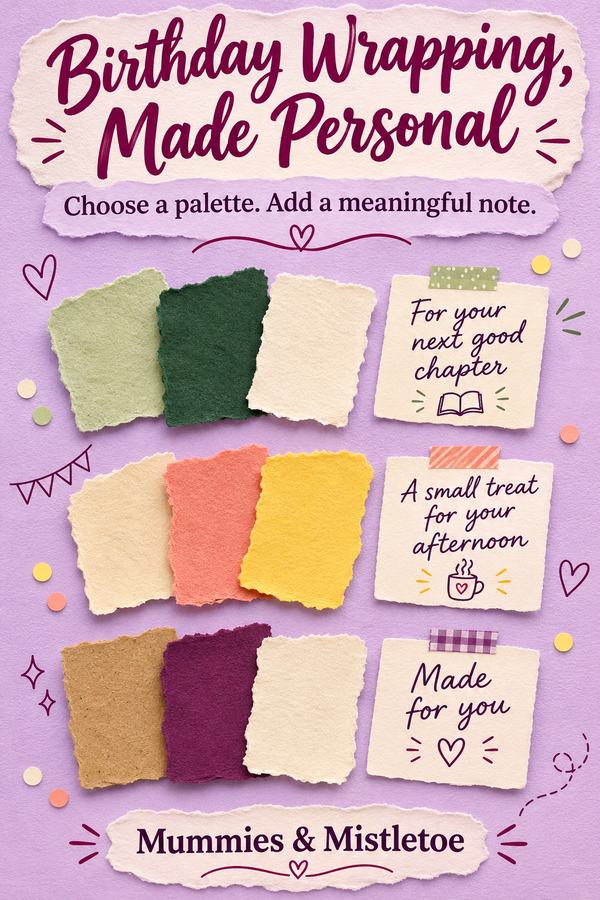
Choose the paper around a detail the recipient enjoys. A reader might like a soft green sleeve with a cream panel. Someone who loves bright birthday parties might prefer coral with a pale yellow greeting. A friend drawn to quiet colors could have plum paper over a light gray package.
Use the recipient's name as the main decoration on the sleeve. Write it by hand, draw simple block letters or cut the letters from contrasting paper. Keep the message under the sleeve shorter, such as “For your next good chapter” on a journal or “A small treat for your afternoon” on a gift box.
The outside can be lively while the hidden note is personal. A specific sentence about the person usually means more than filling the paper with birthday slogans.
Gather Paper and Measure the Package
Set out paper, a ruler, pencil, scissors, a glue stick or double-sided tape and a scrap of cardstock. You'll also need the wrapped present so you can fit the sleeve around its actual shape. Medium-weight paper is easier to curve around corners than thick card.
Choose a sleeve width of about 2 to 3 inches for a small book or shallow box. A wider band gives you more room for a large name; a narrower one lets more of the wrapping show. Cut a trial strip from scrap paper before using your chosen paper.
For a sleeve running around the width of a book, measure across the front, around one thin edge, across the back and around the other thin edge. Add an overlap for joining. A package 6 inches wide and 1 inch thick needs 14 inches to go around, plus about 1 inch of overlap as a starting point. Fit the strip on the package before making the final join.
Make a Sleeve That Slides
Wrap the trial strip around the package and gently crease it at each corner. Hold the overlap at the back. It should sit neatly without squeezing the package or catching on the folded wrapping at the ends.
Slide it off once while you're holding the overlap. If it sticks, loosen it a little and try again. Transfer the successful length to your decorative paper, keeping the sleeve width consistent along the strip.
Join paper to paper at the overlap, with the seam on the back of the package. Keep adhesive away from the gift wrap underneath. Let the join set, then slide the finished sleeve off and on before adding decoration. This fitting step is easier while the sleeve is still plain.
Hide the Birthday Greeting Underneath
Cut a small rectangle of contrasting paper that will fit completely beneath the front of the sleeve. For a 3-inch-wide band, a greeting panel about 2 inches high gives you some room above and below it. Adjust the width to your package and message.
Write the note before attaching the panel. Place it on the front of the wrapped gift, then slide the sleeve over it to check that the greeting disappears. Attach the greeting panel to the outer wrapping with a little adhesive, keeping the edges flat so the sleeve can pass over them.
Add “Slide me” in small handwriting near one edge of the sleeve if you want the surprise to be easy to find. Keep that cue separate from the recipient's name. When the sleeve moves, the greeting should appear in one piece rather than being hidden under a bow or another layer.
Try Three Finished Looks
For a garden-inspired gift, use pale green wrapping with a deeper green sleeve. Put the name on an ivory rectangle and draw two tiny leaf stems beside it. Draw the leaves directly on the sleeve so the whole band slides away together.
For a bright confetti gift, use plain cream wrapping and a coral sleeve. Cut a few small rectangles from yellow, pink and blue paper, then glue them around the name with gaps between them. Leave the back seam undecorated so it stays smooth against the table.
For a bookshop-style birthday gift, use brown wrapping paper and a plum sleeve. Write the name on a narrow cream panel and add a hand-drawn border. A lined journal fits this presentation especially well, with a hidden greeting about the stories, plans or observations that might fill it.
Finish the Gift Before the Party
Test the complete sleeve again after every glued piece has dried. Check that the name stays attached, the seam holds and the greeting panel doesn't lift as the sleeve passes. If a corner catches, smooth it down or move that piece farther from the sliding edge.
For a gift traveling in a bag, keep the front decoration flat. An oversized paper flower can catch on the bag's opening, while drawn details and thin paper shapes are easier to carry. Put the gift in the bag with its greeting side facing up when the recipient lifts it out.
Set the finished present on the table with the name facing the birthday seat. The little instruction at the edge will give them somewhere to begin.
Our Owl and Roses journal suits the bookshop-style version for someone who enjoys dark floral artwork. Try a cream greeting panel beneath the plum sleeve, with a personal wish for the pages they'll fill.