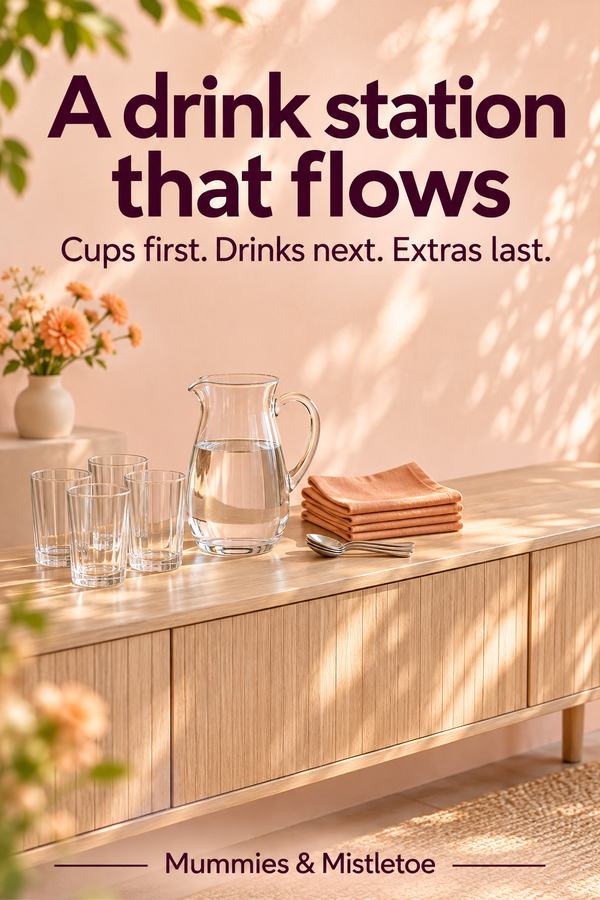
The easiest drink station explains itself: a cup, a drink, a spoon, then a clear place to set everything down. Arrange those pieces in order and guests can settle in without asking where each one lives. These drink station ideas are for the kind of small gathering where the host would like a chance to sit down too.
Choose one helper to keep an eye on refills while guests serve themselves. With the spare cups and drink supplies in one place, topping up the station takes a moment.
Choose Two Drinks Before Choosing Containers
Offer a main choice and an alternative, with water available. For an afternoon visit, that could be tea, one cold drink and water. For a morning gathering, coffee and tea with water may be enough.
Match the drinks to the people coming and the food you are serving. For a small group, two pitchers may be all you need. If you use a dispenser, leave enough height beneath the tap for a glass and a small drip tray.
Test the actual container with water before the party. Check for leaks, make sure the lid fits and practice pouring while holding a cup. If you have to lift the dispenser to use its tap, it needs a different position or a different serving plan.
Arrange Drink Station Ideas in Serving Order
Place cups or glasses at the beginning of the surface. Follow with the drink containers, then additions, spoons or stirrers and napkins. Leave an empty patch at the end where someone can set a cup down while stirring.
On a four-foot sideboard, try the cups in the first ten inches, drink containers in the middle and spoons and napkins at the far end. Leave space to grip handles and turn taps. A second small surface can hold water if the main station feels crowded.
Put a drip tray beneath the dispenser and keep the glasses fully on the counter. A small folded towel nearby makes the inevitable splash easy to catch.
Keep Hot Drinks Away From the Busy Path
Use kettles, coffee makers and hot-water containers according to their instructions on a suitable stable surface. Keep cords out of walking routes and away from places where they could be pulled. If children are attending, arrange adult help for hot drinks and keep the hot area out of their reach.
Ask one helper to brew the next pot of coffee or tea. Guests can choose their cup while the person who knows the equipment handles the brewing.
Set a pitcher of cold water and a few glasses on a separate surface. Someone who only wants water can help themselves without waiting behind the coffee drinkers.
Calculate a Starting Quantity
For eight guests, two 8-fluid-ounce servings each add up to 128 US fluid ounces, or one US gallon. Use that as a starting calculation for a short visit, then add more for a longer gathering or warm weather.
Decide how to split that amount among the choices, and keep extra water available. Event length, weather, food and activity can change what guests want. A short indoor visit and a long outdoor afternoon need different judgments.
Count cups separately from drink volume. If guests will switch drinks, you may need extra cups or a way to wash and return them. For a small group, removable name markers can help guests recognize their glasses without permanently marking the drinkware.
Put the Extras Where They Belong
Put milk and sweeteners beside the drinks they go with. Label milk alternatives and prepared drinks, and keep ingredient information available for guests with allergies. Give each shared addition its own spoon.
Keep milk and cut fruit refrigerated until needed, bring out small quantities and replenish from the refrigerator. For a longer gathering, use a chilled serving setup that keeps perishables cold.
A short sign can identify tea choices or point toward used-cup storage. Use readable lettering and keep it out of the pouring area. The station should explain itself through its arrangement, with signs filling only the remaining gaps.
Build a Refill Kit
Gather spare cups, napkins, spoons, drink supplies and a clean serving tray in one place. Keep cleaning materials separate from food and drink items. Tell the helper where the kit is before guests arrive.
Check the station after arrivals and when the food comes out. Refill clean supplies, wipe spills and clear used cups. For a hot container, follow its refill instructions so the helper knows when to switch it off or let it cool.
Set a separate tray nearby for used cups. Clear it regularly so the clean stack stays easy to find.
Finish With One Seasonal Detail
Let the cups, a small cloth or a picture supply the seasonal color. A mug collection can make the hot-drink area personal without needing a display across the whole counter. Keep decorations away from handles, taps and food.
Repeat a cup color in the napkins or a little arrangement beside the station. A blue mug with blue checks, or cream pottery with a green sprig, is enough to make the corner feel considered.
When guests arrive, you can point them toward the cups and return to the conversation. The spare napkins are already where your helper expects them.
For a Christmas coffee gathering, our Nutcracker soldier-trio mug brings raspberry, jade and gold to the cup end of the station. Repeat one of those colors in the napkins and leave the pouring space clear.