Neat book corners start with the amount of paper you cut. Too much bunches at the ends; a close-fitting sheet folds flat and leaves room for a simple bookmark band. This method works for a book or a gift journal of a similar shape.
Use a clean, dry work surface and wrapping paper with enough body to hold a crease. A gift journal wraps in much the same way as a book of similar size. Work gently around a paperback or dust jacket, and attach tape to the wrapping rather than the book.
Measure the Long Wrap First
Place the book face down on the paper so the finished seam will sit on the back. Bring one long side of the paper over the book, then bring the opposite side across it. A small overlap keeps the center seam flat.
For a starting calculation, twice the book's width plus twice its thickness gives the distance around the cover and spine in that direction. Add roughly an inch for overlap, then test the fit on the actual book before cutting. A 6-inch-wide book that is 1 inch thick would start with about 15 inches of paper for that wrap.
Keep the paper loose enough to meet without forcing the covers inward. If the dust jacket shifts while you measure, straighten it before continuing. A smooth package begins with the book sitting squarely inside it.
Cut the End Allowance to Fit
The other paper dimension covers the book's height plus the allowance at the top and bottom. Fold one end loosely to see how much paper reaches across the book's thickness. You want the flaps to overlap without leaving a large wad in the middle.
For a thick book, start with an end allowance a little greater than half its thickness on each flap side and test the fold before trimming. For a thin book, leave enough paper to handle and crease comfortably even though the thickness is small. The trial fold matters more than a single rule for every binding.
Trim gradually with the book set aside so the scissors cannot catch a cover or page. Put the book back in the same position and check both ends. If you've cut too short, start with another sheet that fully covers the corners.
How to Wrap a Book Along the Main Seam
Bring the first long edge over the back of the book and hold it in place with your hand. Fold a narrow hem along the other long edge for a tidy finish, then bring that edge across the first. Secure the overlap with tape on the paper only.
Use enough tape to keep the seam closed without covering it from end to end. Smooth the paper across the back, then gently crease along the book's edges with your fingers. Don't press hard enough to mark the cover or flatten a soft binding.
Check that the seam is straight before folding the ends. If it has drifted diagonally, lift the tape carefully if the paper allows it and reset the overlap. Correcting the seam now is easier than trying to hide the twist under a bow.
Fold Each End in a Clear Order
At one open end, push the two narrow side sections inward against the book's edge. This creates an upper and lower flap with angled corners. Crease those angles gently so the paper follows the shape of the book.
Fold one broad flap down, then fold the other up over it. Tuck a narrow raw edge under if needed for a clean line, and tape the final flap to the wrapping. Turn the package around and repeat at the other end.
If the flap won't lie flat, open that end and check for excess paper or a twisted side fold. Trim a small amount only after moving the book away from the cutting area. Avoid adding more tape to hold down a fold that needs adjusting.
Add a Bookmark Band Instead of a Large Bow
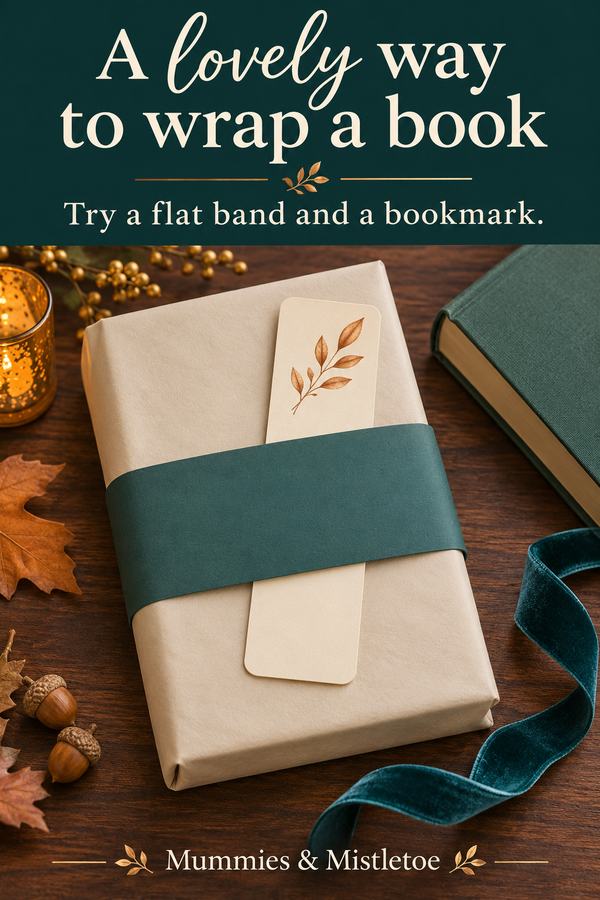
Wrap a paper strip or soft ribbon around the closed package and fasten it to itself at the back. Keep it snug enough to hold a bookmark but loose enough to slide off. A flat band lets the book sit neatly in a gift bag or travel inside a box.
Tuck a paper bookmark under the front band, with enough showing for the recipient to see it. Write the message or name before placing it there so you aren't pressing a pen against the wrapped cover. If the bookmark has a tassel, let it hang freely outside the band.
Choose one color from the book's cover for the band or bookmark if the recipient will enjoy that connection. A floral journal can have a plain green band; a brightly illustrated book may suit a quiet cream strip. Let the wrapped shape remain the main part of the gift.
Adjust for Paperbacks and Two-Book Gifts
For a flexible paperback, work with the book lying flat and avoid tightening the paper enough to bow the covers. A suitable gift box can help if the package needs more protection during transport. Choose a box that supports the book without crushing it.
For two books of similar size, place them together and measure the combined thickness. Keep the stack aligned while making the main seam. If their sizes are very different, wrap them separately and join the finished packages with a loose band or place them in a suitable box.
Wrapping paper is presentation, not shipping protection. If the gift will be mailed, use appropriate outer packaging and cushioning for the books and follow the carrier's requirements. Keep a decorative bookmark or fragile topper protected inside that outer package.
Finish With the Note Where It Can Be Found
Slip a personal card under the band or inside the gift bag. If you've chosen a journal, a loose note can explain why you thought the cover or format would suit the recipient. Leave the pages unmarked unless you know they would welcome an inscription.
Lift the package from underneath and check that the end folds remain closed. Smooth any raised tape edge and make sure the bookmark won't slip out during the trip. Set the wrapped book flat with its name facing upward.
The corners should now sit against the book instead of standing away from it. Slide the card under the band and leave the first page for the person who will open it.
For a recipient who enjoys gothic florals, our Skeleton and Roses journal makes a fitting book-shaped gift for this wrap. Choose a plain band that echoes the cover and add your handwritten bookmark before slipping it into the bag.